Step one was to make the colors. This was the most time consuming step, as always. See all the pretty shades of purple? The dark ones look more blue, but it's actually a vibrant purple color. Along side my shades of purple is my sketch of the first two kaleidoscope beads.
I did the same thing as I did with the different shades of purple as I did with orange and yellow clay.
After my color canes were done, I put some of them together to make my first triangle for the first kaleidoscope bead. Here's what that looked like:
I stretched the triangle to make six and eagerly put them together to make my star....
 |
| HAD to throw this belly shot in. The baby bump got in the way of this photo. Hello baby! |
Whoops! I was actually supposed to make 12 triangles, not six, to make a star. A tiny oversight in my planning, but it didn't matter. I just stretched the 6 canes to make 12. I'm looking for a star here, not a triangle! You can see the final cane in one of the last pictures on this post.
Then I set to work on my second kaleidoscope cane. Here's triangle that is doubled up before I stretched into 6 parts parts. The first triangle was half of this.
The finished cane is a few pictures down...
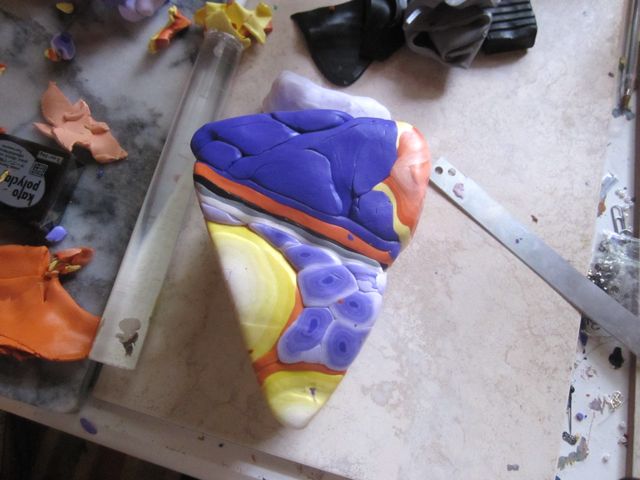
Lastly, I made the third triangle. It looked an awfully like a candy corn and I was worried how it would look. You never really know with these kaleidoscope beads...
Here's the triangle after it was doubled up (side by side) and stretched into six triangles.
After it was pieced together:
And finally, all the canes together before they were rolled out small.
After I rolled out the first cane, I realized it, it was not what I had in mind. So I fixed it by performing surgery on it. There are no pictures of the surgical procedure, but you will see in my next post (the final product St. Andrew's Chaplet) that it looks much better. I was sad to lose two thirds of the cane, but, hey, sacrifices had to made. He was a real trooper (the cane that is...) and he came out looking much better in the end. I'm telling you, these kaleidoscope canes can be unpredictable!
Next step:
Slicing and punching holes. for hours on end.
to be continued.


4 comments:
You are so incredibly talented! Those beads look amazing.
These are beautiful. I agree with Karen, you are incredibly talented and patient.
love, love, love! i am glad we got a sneak peak of your baby bump too!
Sarah I loved this post! It's so much fun seeing how you make these beads.
Post a Comment